It’s been awhile…

Well, it’s been almost three months since the last post.

But those three months have been crazy for us. Not only are we going through the kitchen remodel, but we certainly never planned for a worldwide pandemic to hit through this process. We are so fortunate and thankful that we have not been impacted by COVID-19 and our thoughts are with those who have been impacted both health reasons and financial.

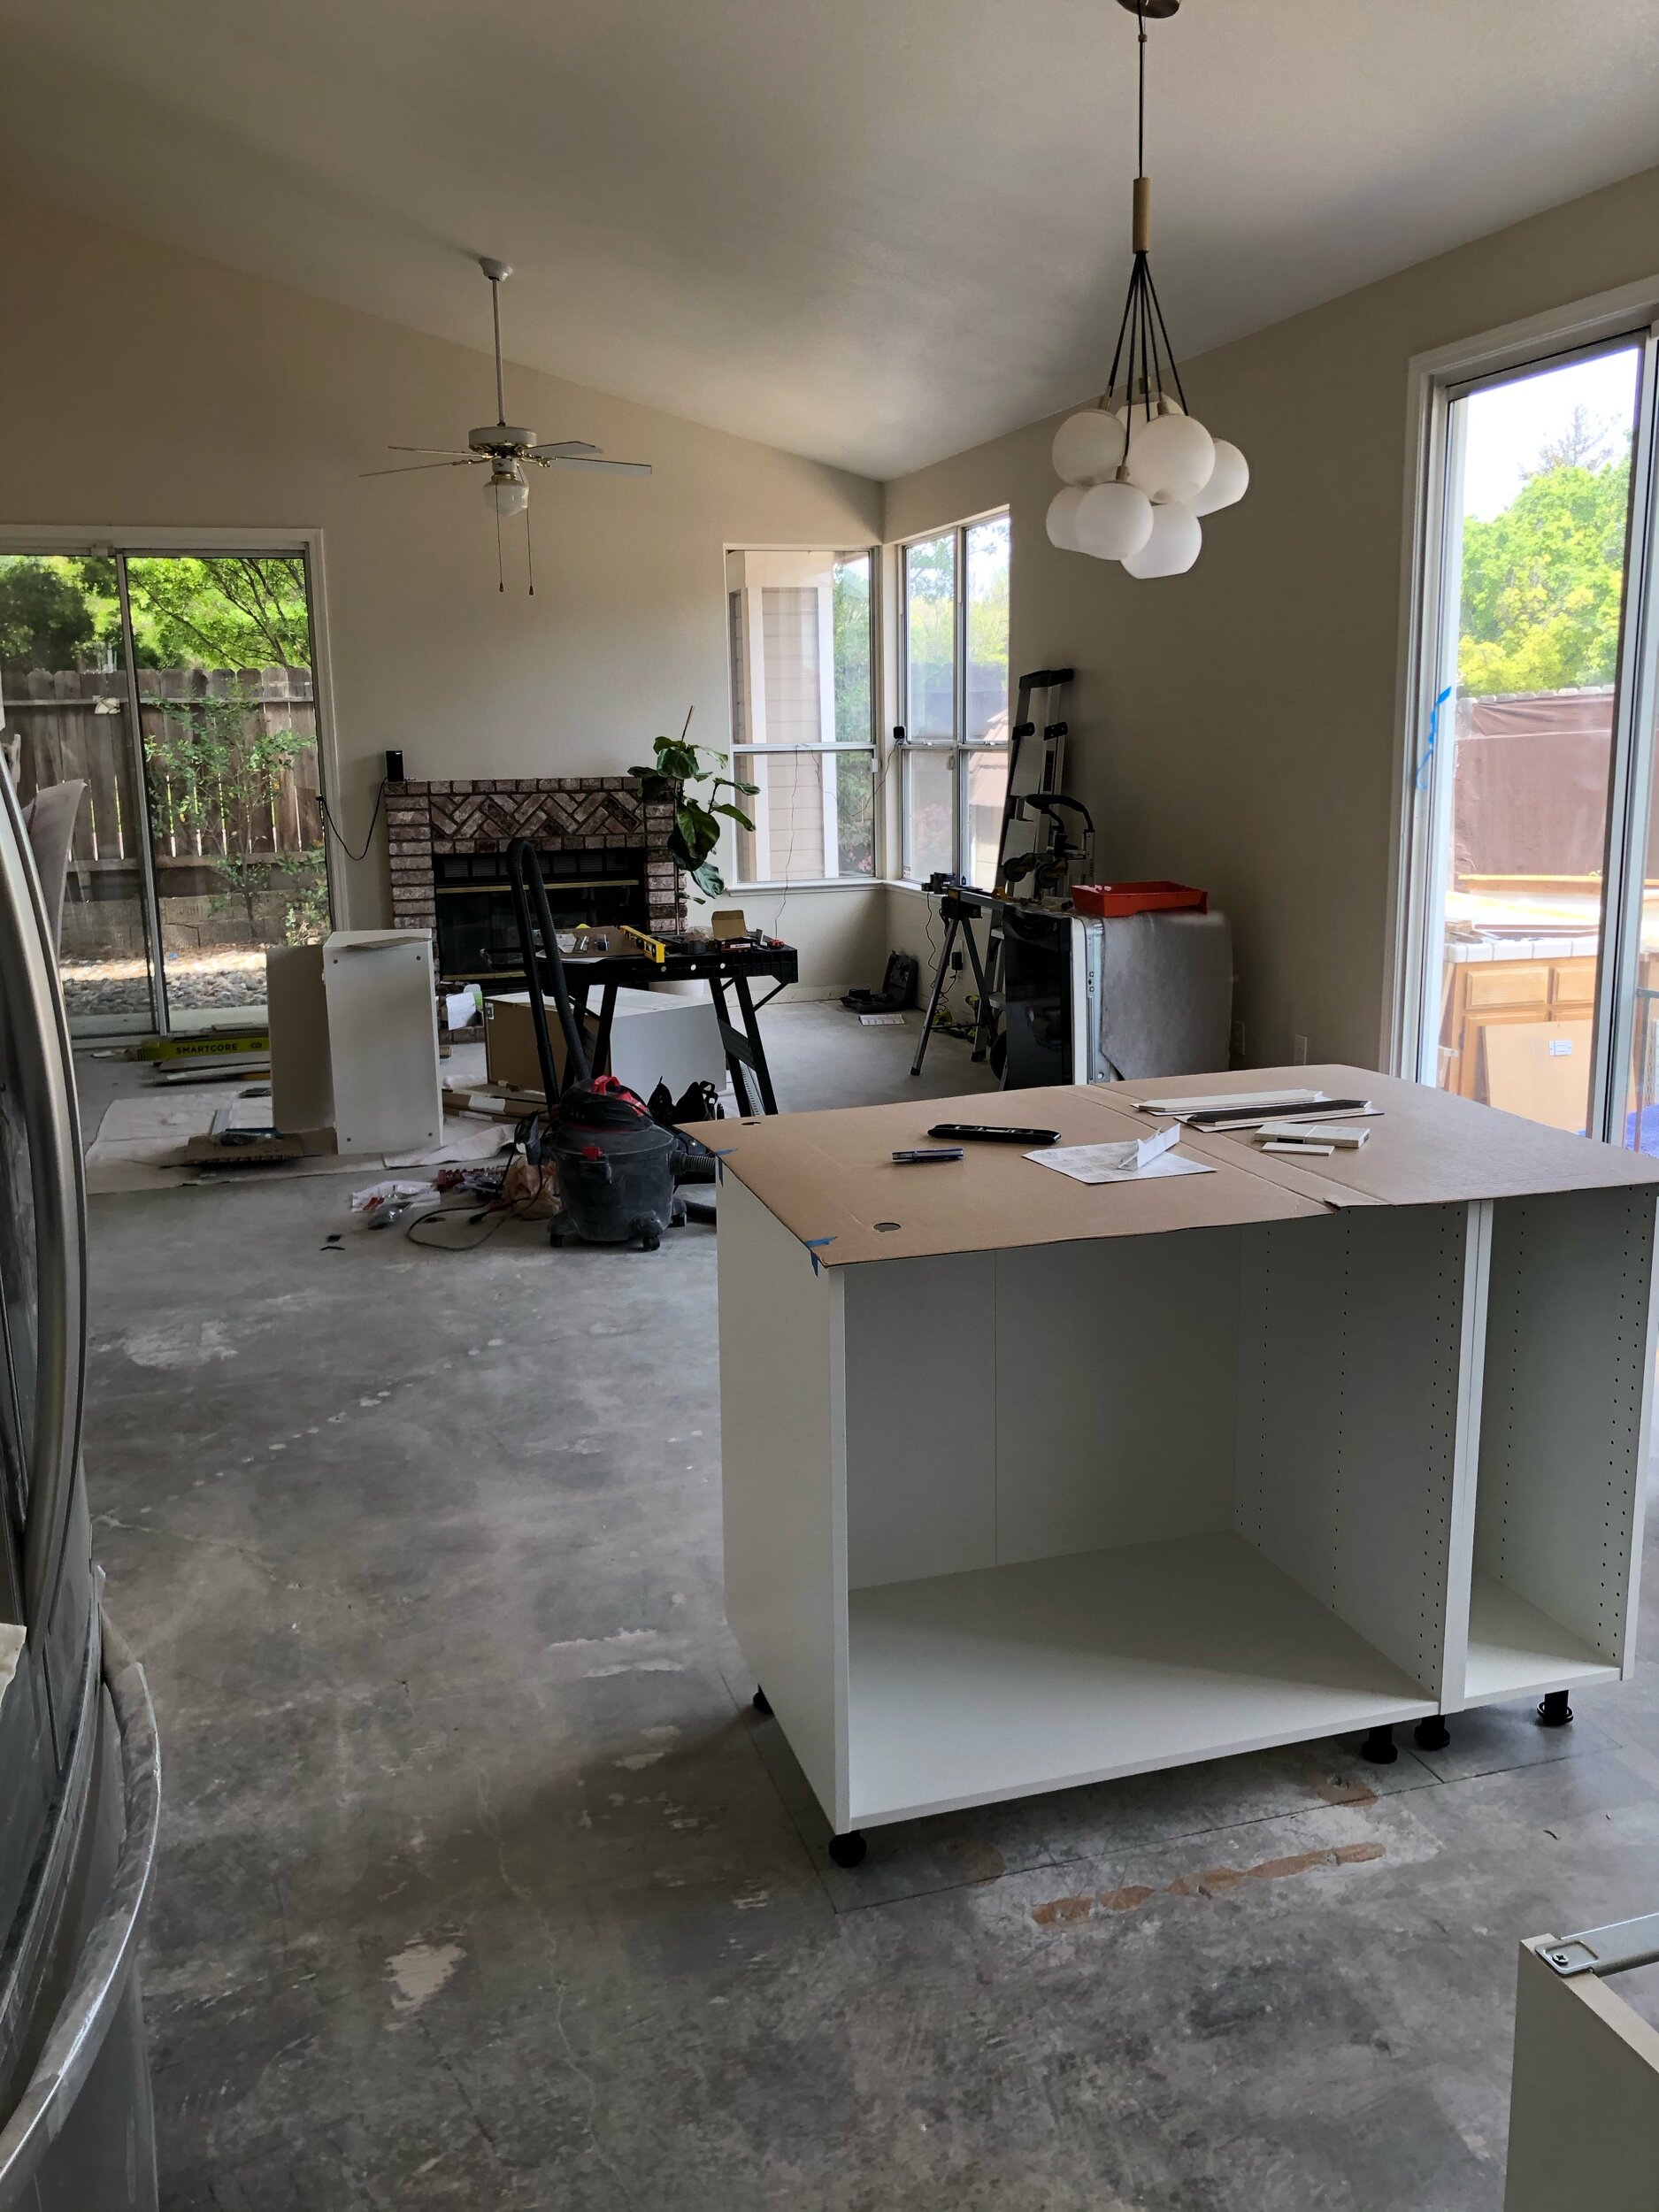
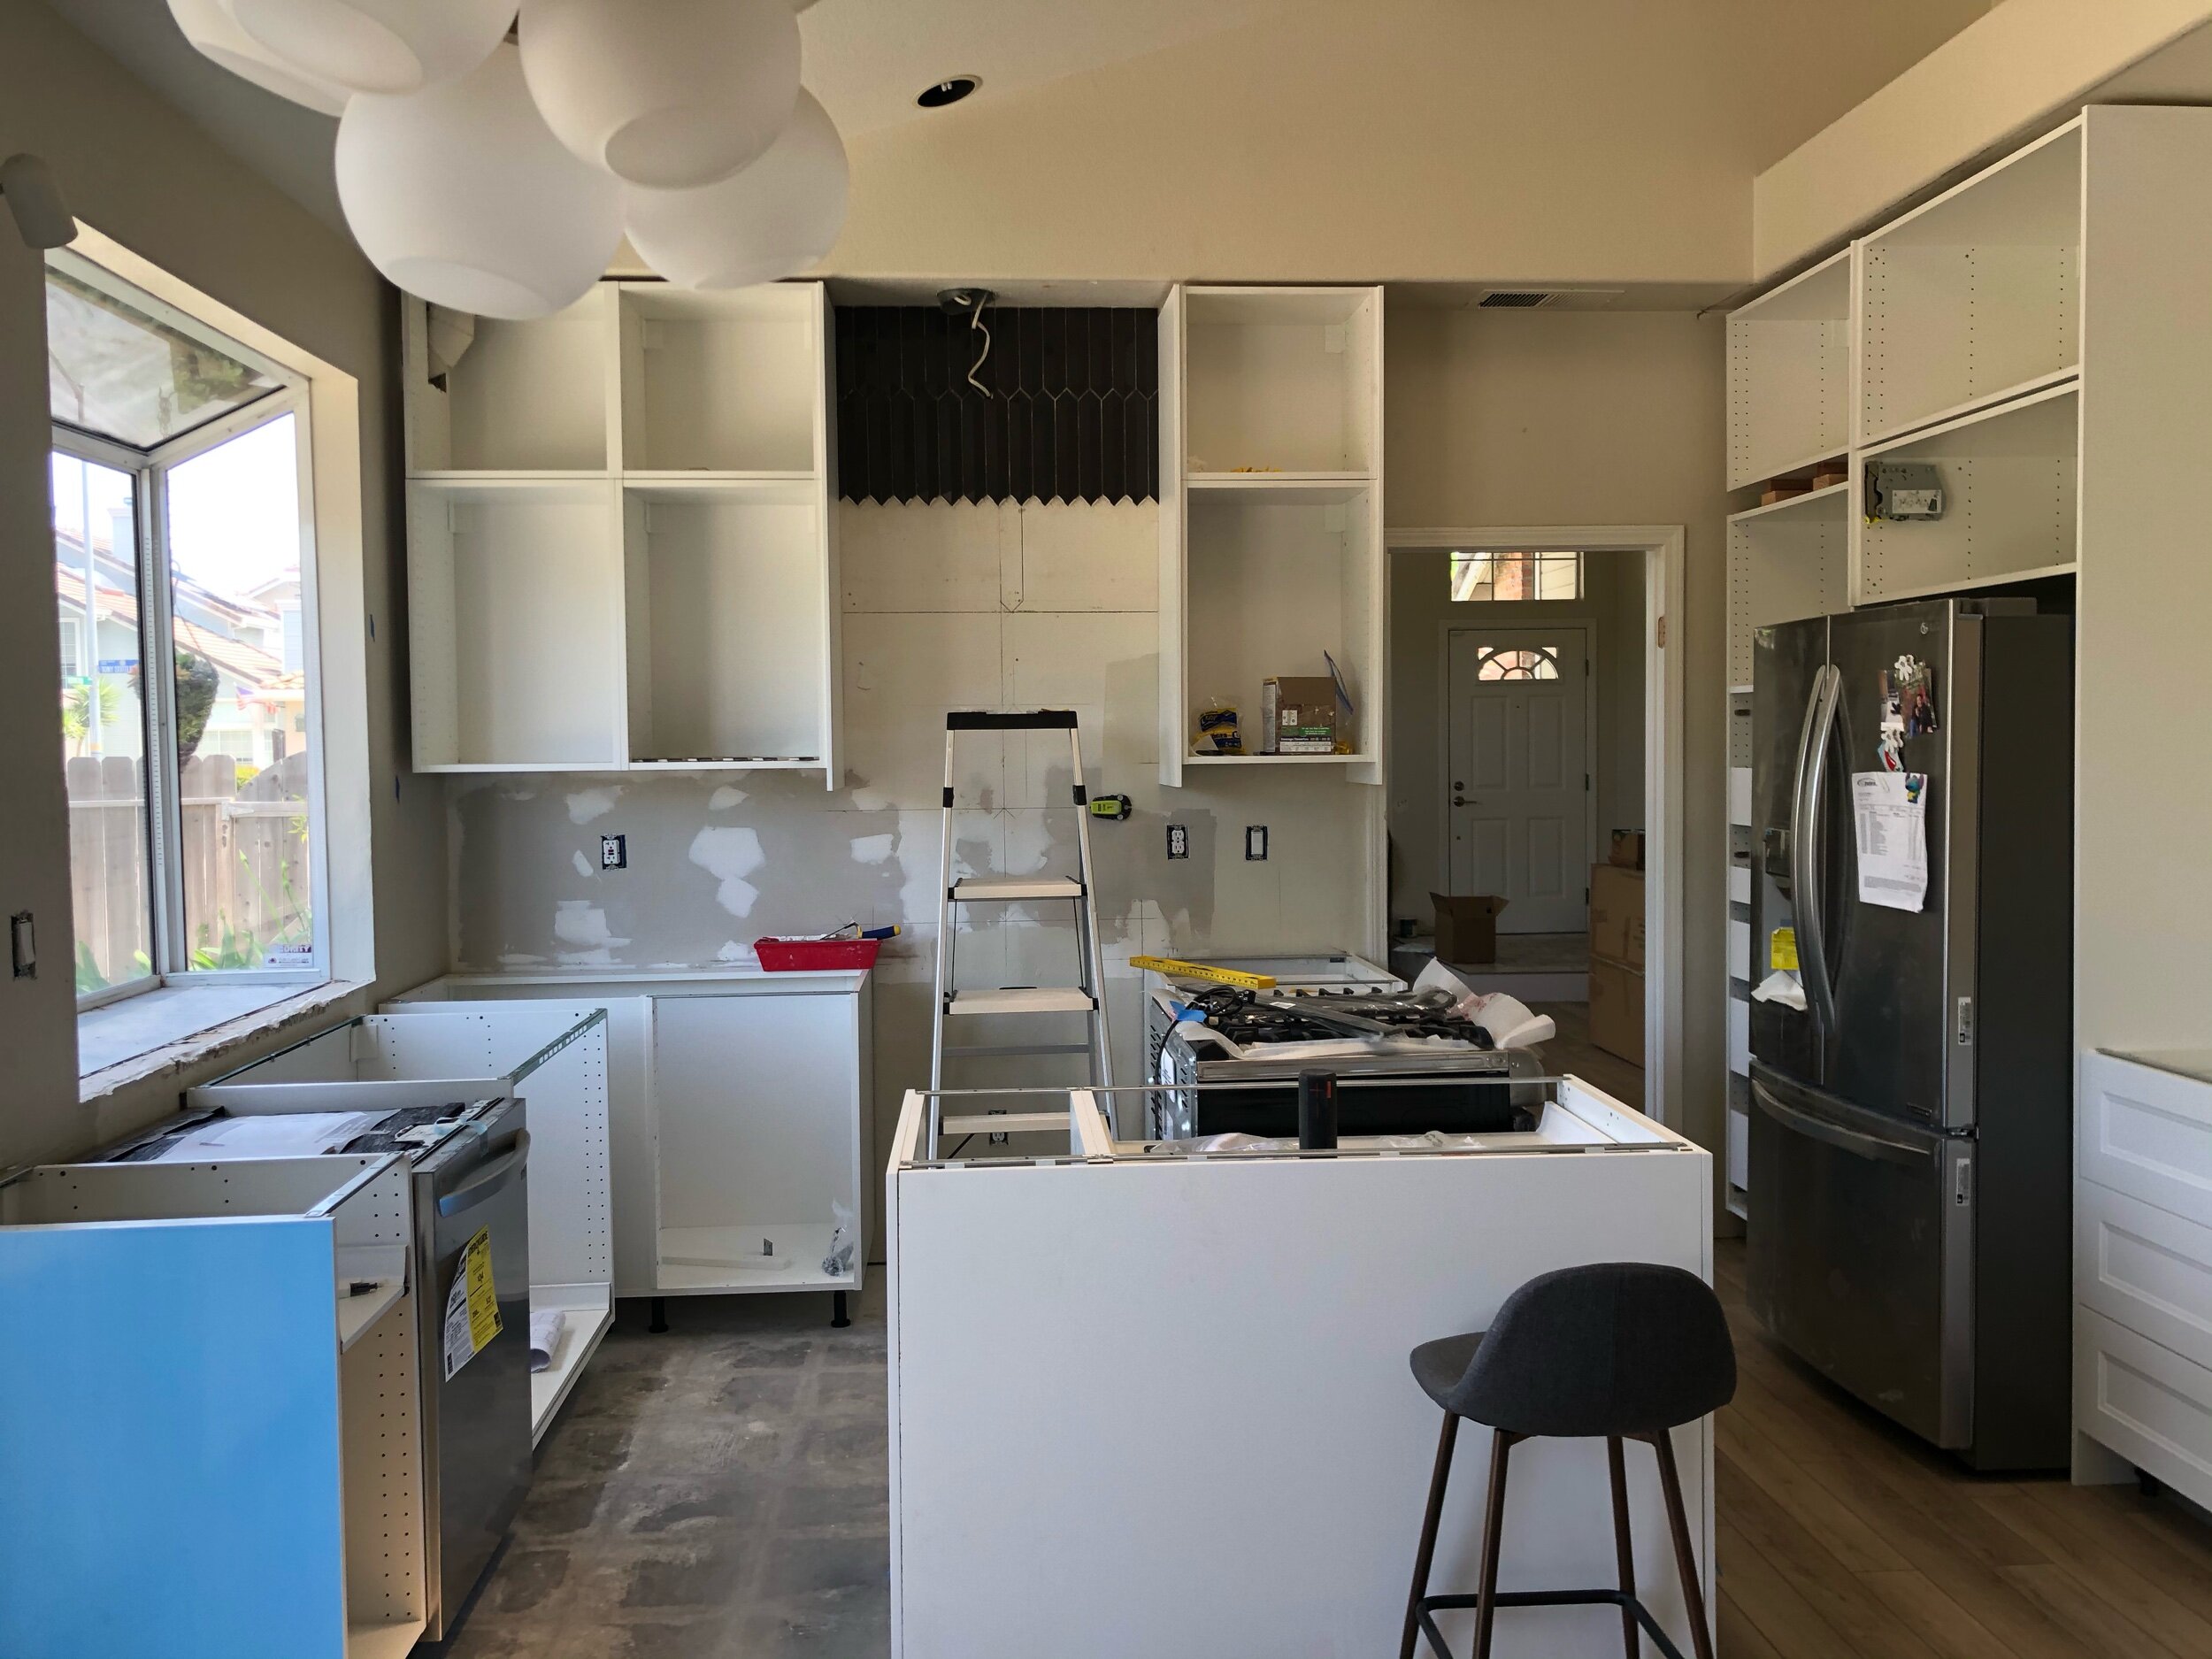
Luckily, Home Depot has still been open throughout this process and we’ve been able to continue moving along in the kitchen. The last you saw of the kitchen was basically just bare bones. We had to do some work to get the kitchen to a place of being able to get cabinets in. Then, we started to install each of the cabinets.


Cabinets

The system that IKEA has built around their cabinets makes the installation process fairly easy, but the walls didn’t always cooperate with wanting to be even, so we had to make plenty of adjustments along the way. The first set of pictures shows the cabinet installation. Once we had the walls all fixed up, we put all the cabinets together and we installed the brackets to the wall. It’s a fairly smooth process and the construction material of IKEA kitchen cabinets is much different than regular IKEA furniture (and much heavier!)


IMG_7861.jpeg

What to do with extra space?

We found ourselves with an odd space in the corner of this side wall where we were either going to have a lot of dead space behind the cabinets or we could get creative. Steven built this wine wrack (we still need to put the inserts in for the bottles) and it fits perfectly in the space.


Countertops

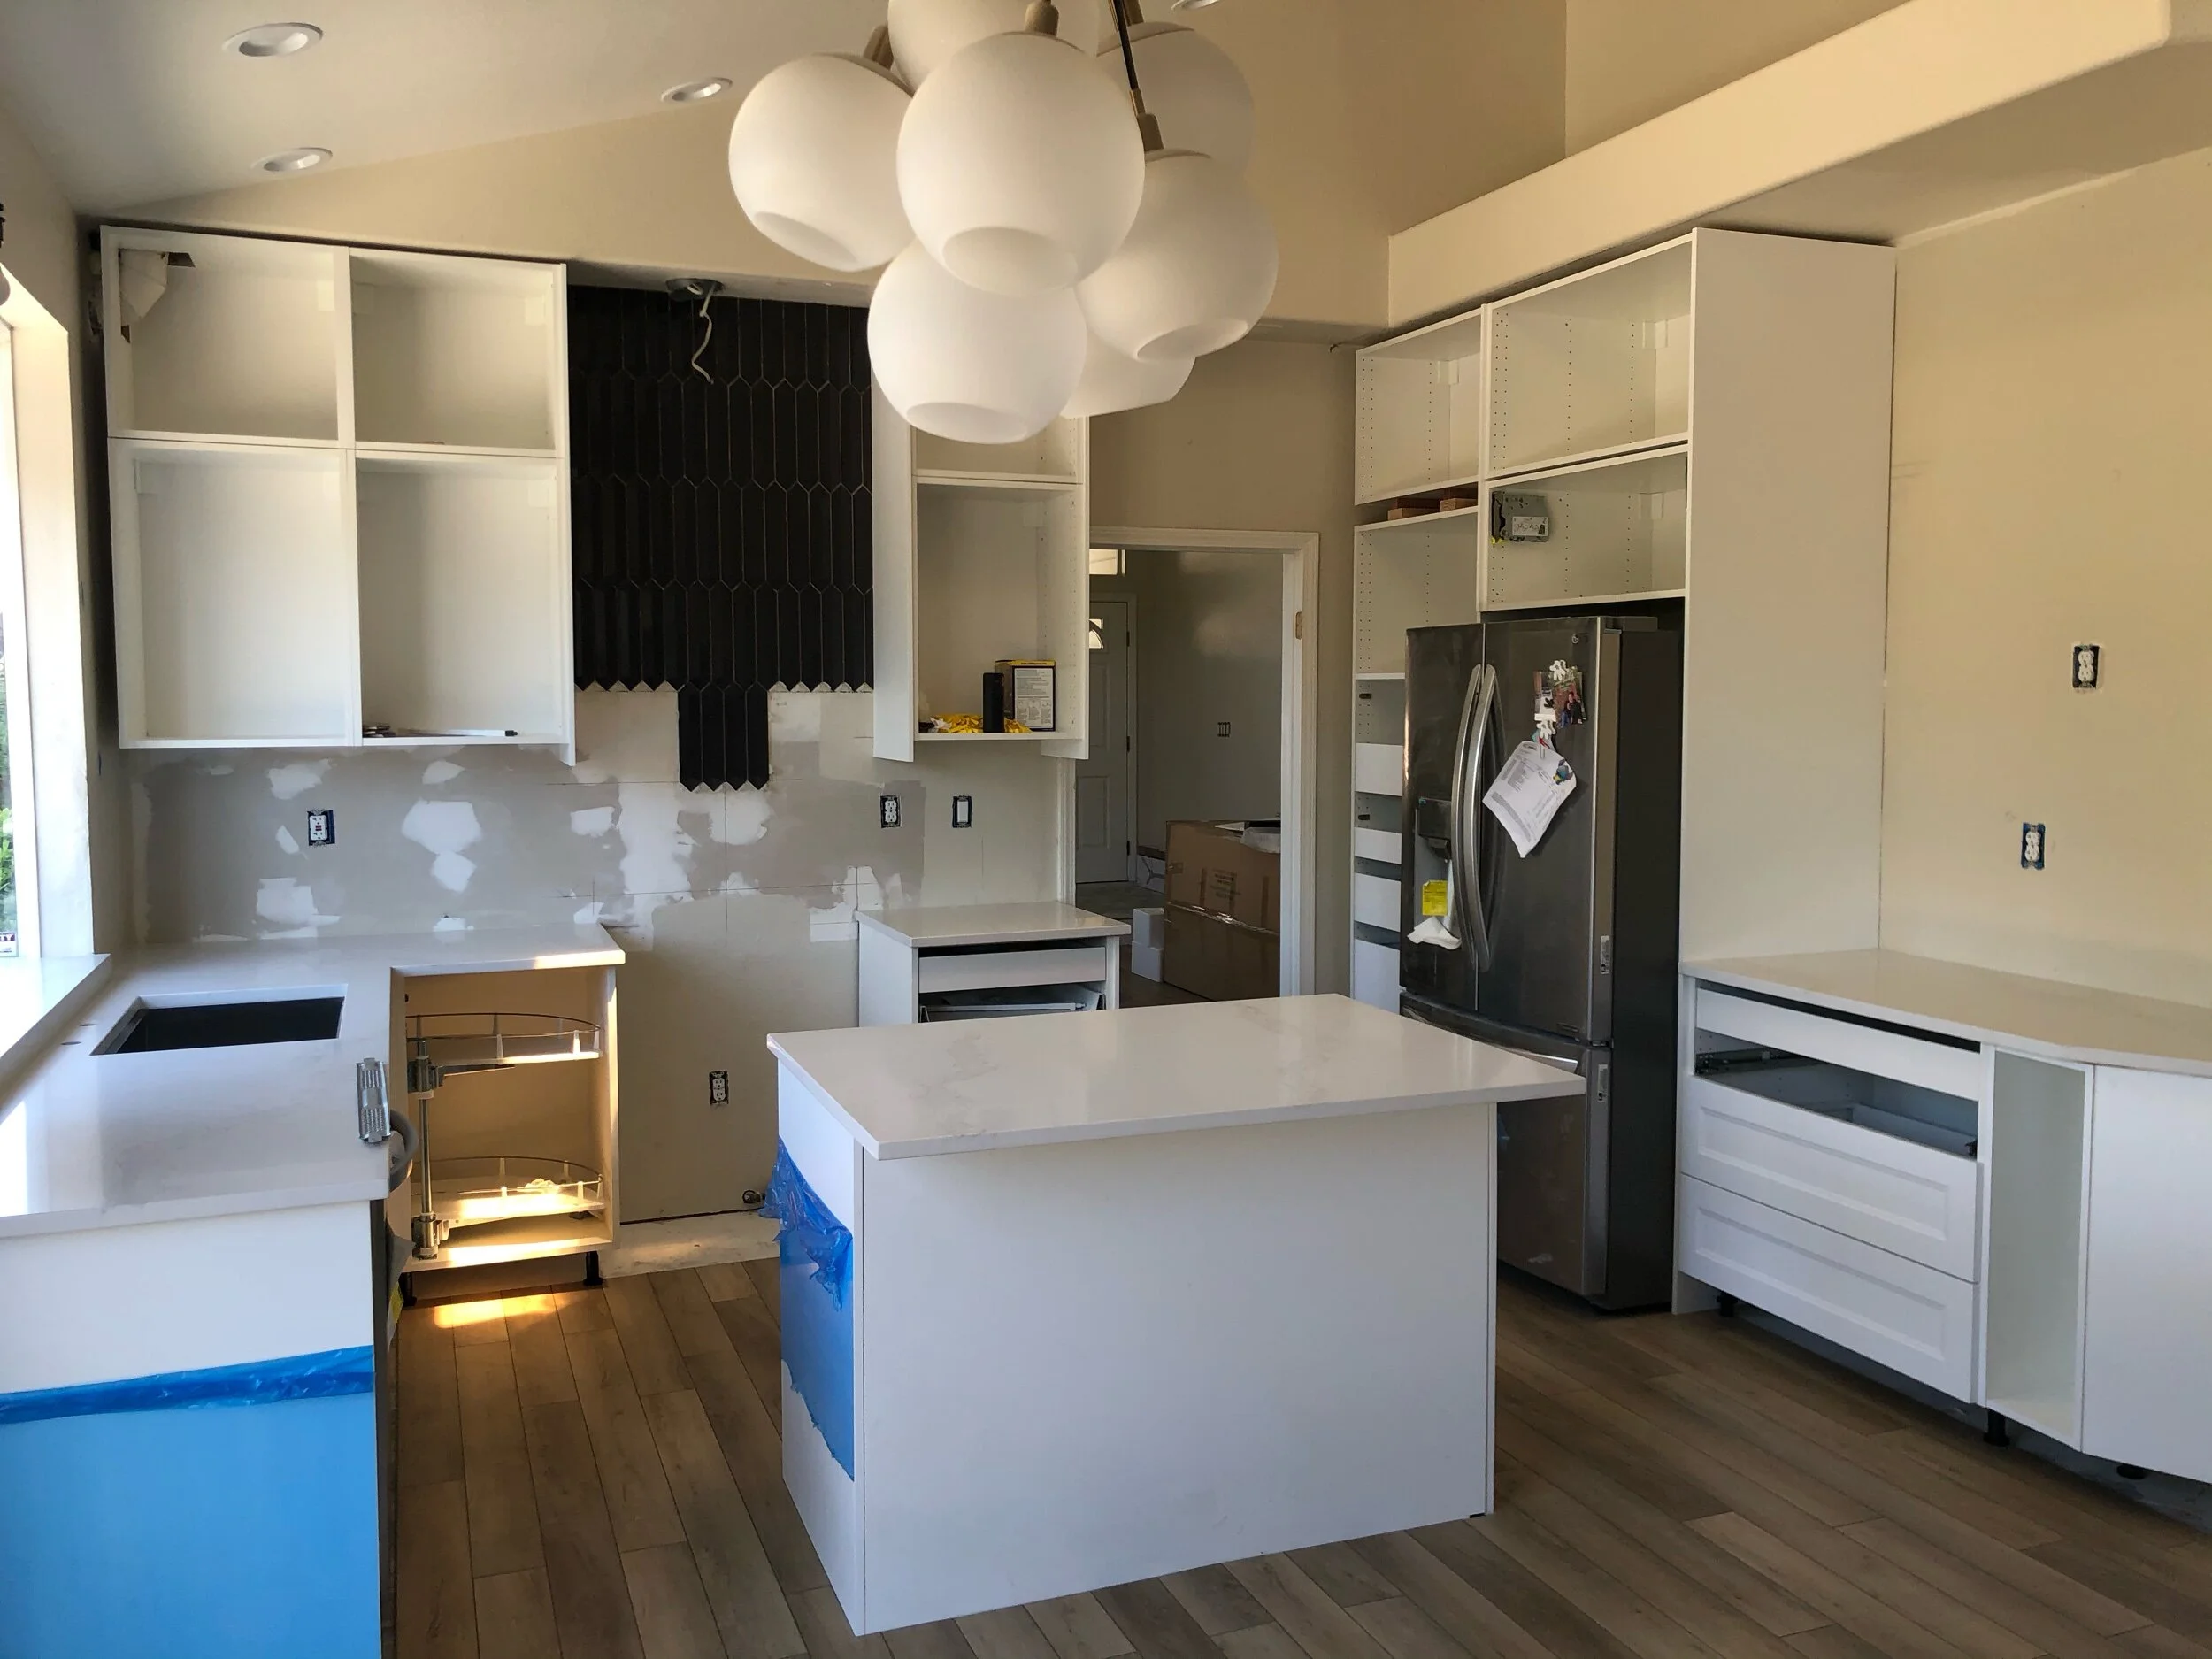
Once we had all the cabinets in, we began to prep for countertop installation. We spent many, many weeks deciding what countertop we want. Got quotes from several places and looked at many different styles, but we always knew we were going to go with quartz. We ended up ordering our countertops from Home Depot who then uses a company out of Sacramento called BlockTops. At this time, we began to prep the backsplash behind the new range hood. The first collection of pictures below shows the tile going in and the cabinets all ready for countertop installation.

This next set of pictures shows the countertops installed and some closeups of the design we went with. It’s subtle and turned out perfect. We decided to go with an undermount sink and check out that beautiful faucet ;)

Getting the faucet and garbage deposal installed was another adventure. Plumping became another household repair added to our list.


Current Status

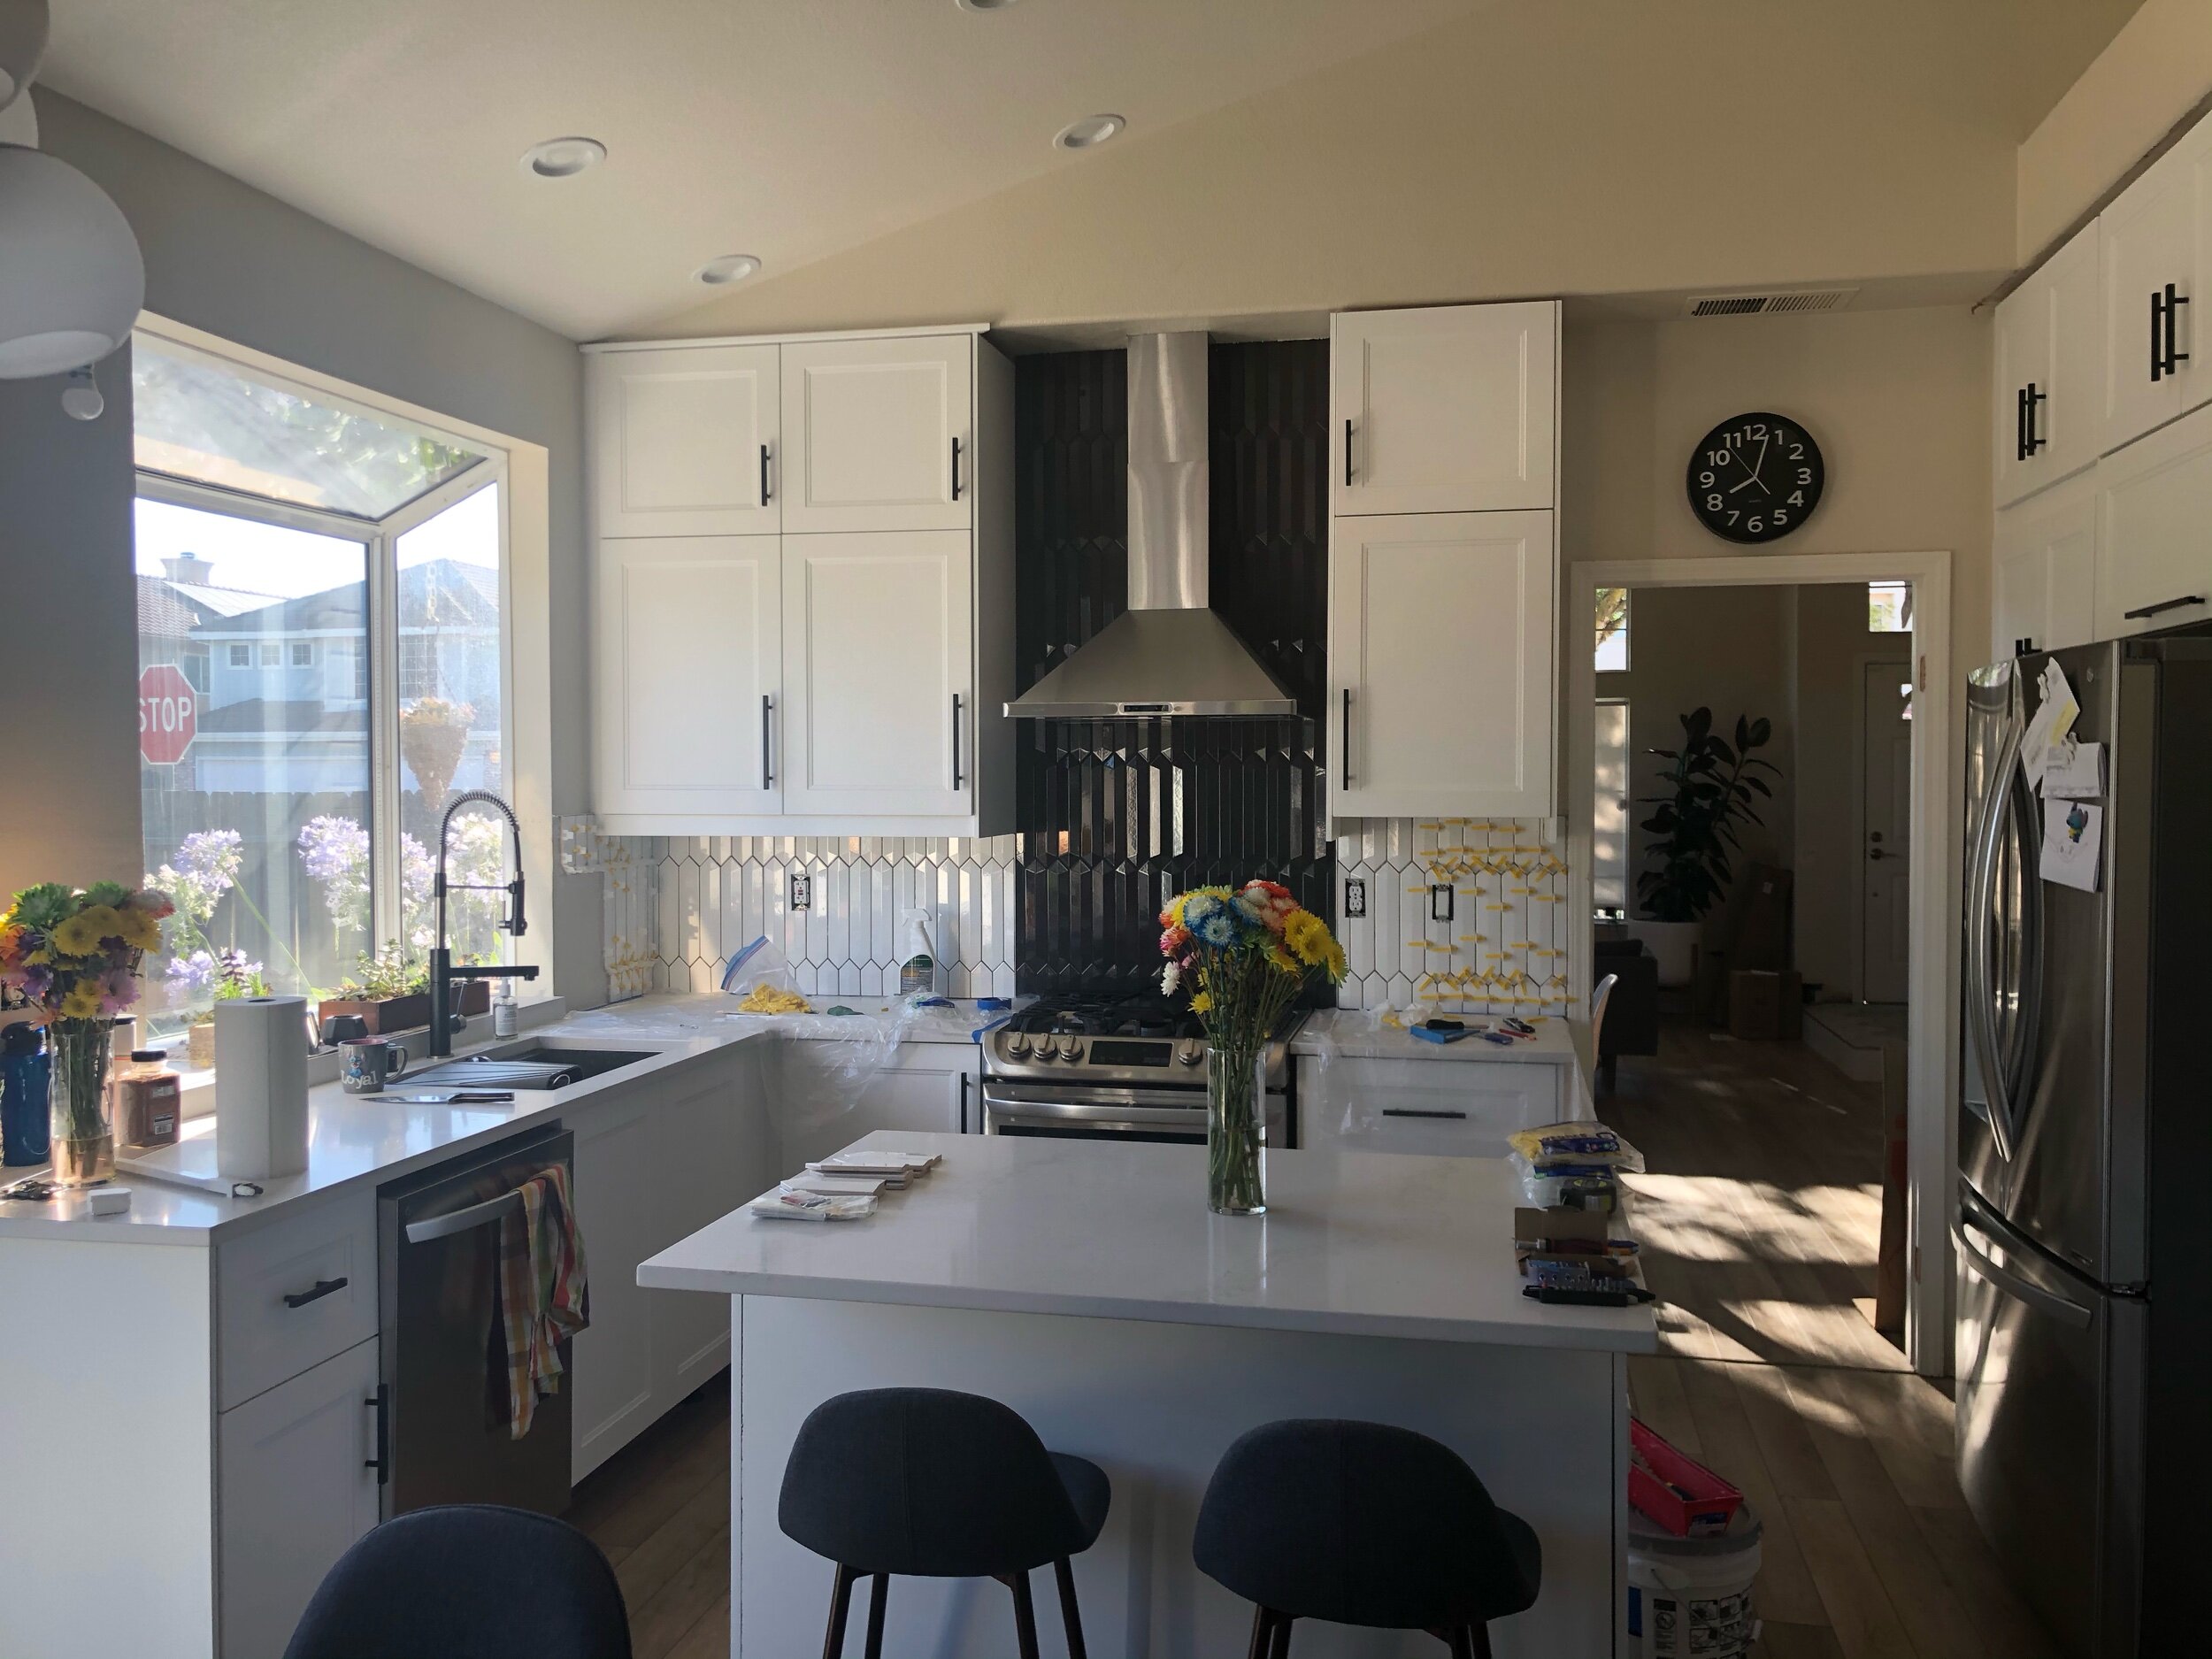
And here we are now. Doors are on the cabinets, a large majority of the backsplash tile is up, floors are done, and appliances are in and working. Still have more to do: finish up trim, finish up tile, and decorate. As we finish up, we’ll update more often and finally show the finished project soon!

IMG_8413.jpeg
IMG_8415.jpeg

Where we started, after the demolition, and where we are now.

Where we started, after the demolition, and where we are now.


Chloe’s Corner

There were so many loud bangs going on for awhile, but now I’m happy the bangs are done and there’s actually flooring for me to lay on. My dads spend all of their time in the kitchen and I serve as the ultimate supervisor making sure they’re getting things done to my liking.

Week Is Over…

Well, here we are… Sunday night. After taking the week off on PTO to work on the kitchen and family room, we both feel a little defeated. Our optimism certainly got the best of us thinking we’d have cabinets in before the week was over.

We certainly got A LOT done and the week off was a huge help to get us to the point we are at now. As with any home project, we ran into obstacles that significantly impacted our timeline. From the chicken wire in the countertops, to the insane amount of mortar on the floor, to the drywall needing to be replaced and even some crazy electrical obstacles… we certainly had some curveballs.

We are finally (almost) to the point of having all the demolition and structural work done and can actually start working on getting the cabinets in.

We are so happy with all the open space that the work we did has created. Once we are all done, the kitchen and family room is going to be a wonderful entertainment space.

Now that we will be back to our day jobs tomorrow (Monday), we will be spending evenings and the next couple weekends finishing things up. We are still making some final design decisions on countertop and backsplash, but almost done getting those sorted out.

Thanks for following our journey this week. Stay tuned for much more and eventually, the final product. Having no kitchen during a time of closures across all industries is interesting, but we have a grill and a microwave, so we figure it all out! 😜

Some photos of the finished drywall to end out the week.

Stay safe and healthy out there!

This Wall… Why?

Slight delay in posts, but we’ve definitely been working hard. After the terrible backsplash encounter, we discovered we needed to replace some drywall. So, now we have been learning how to work with drywall. Lucky us. 😜

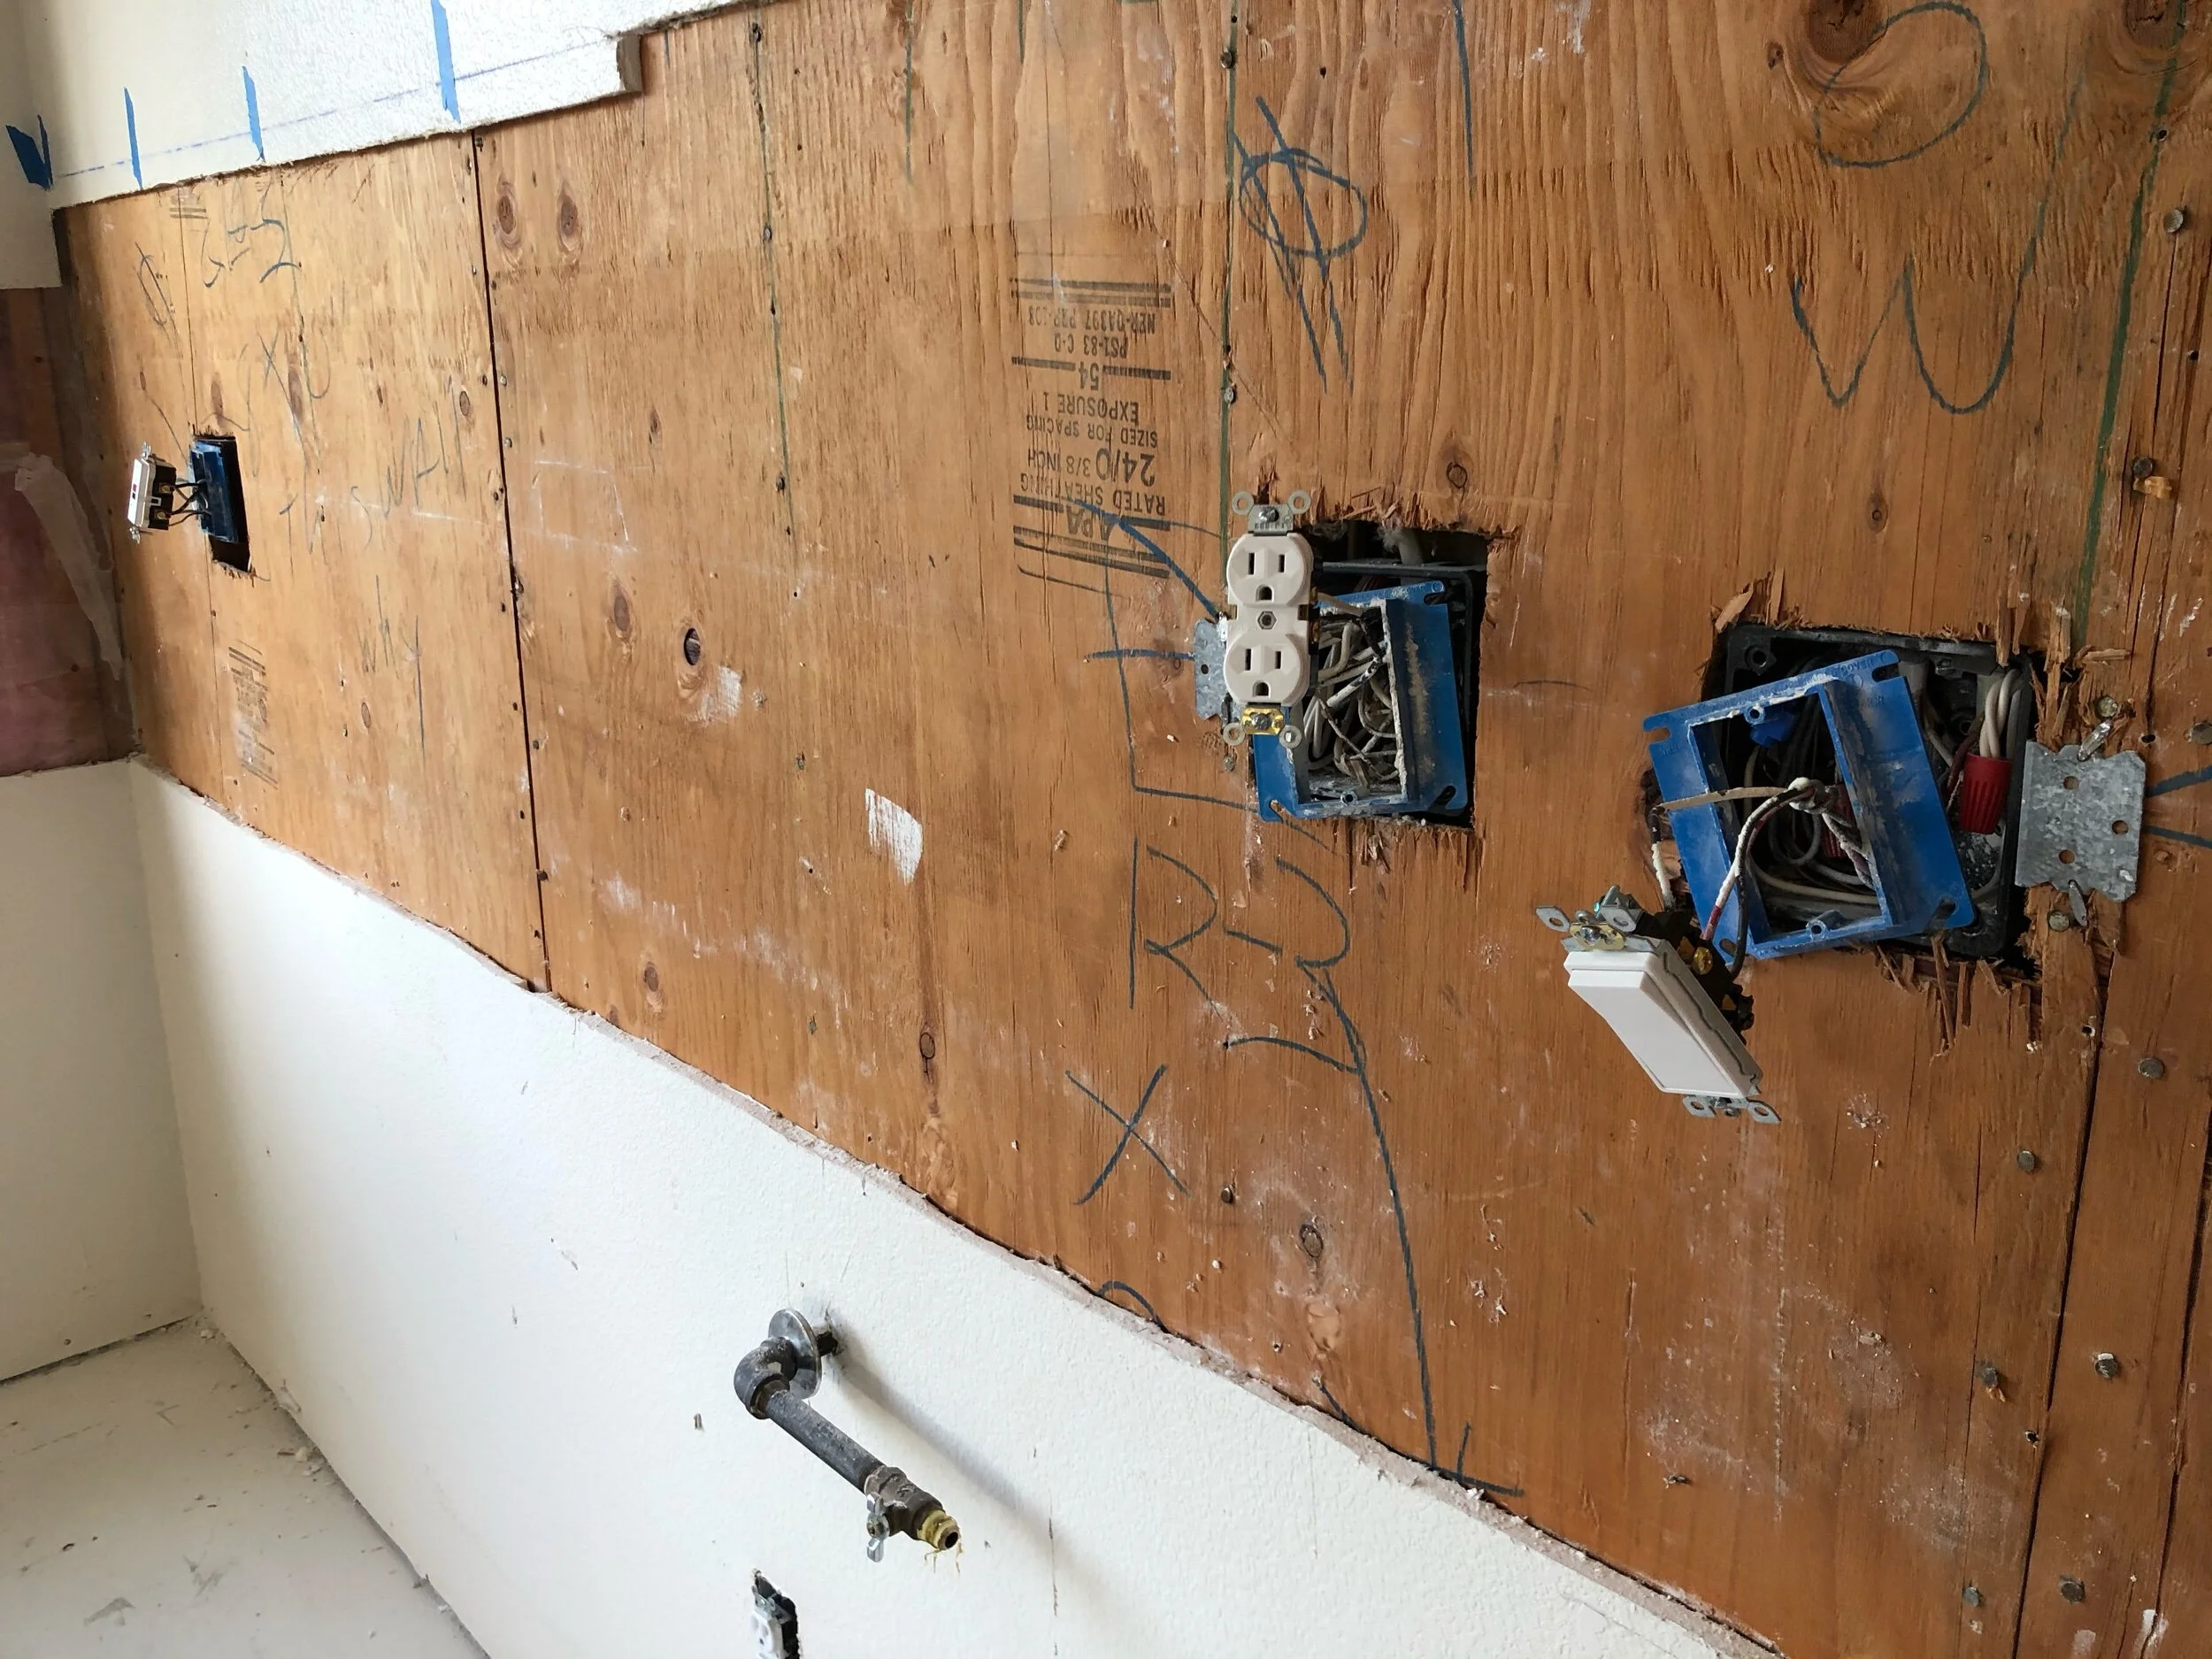
Ripping off the old drywall, we came across plywood all along the wall which has a message written from the original construction that basically sums up our last few days… “This Wall. Why”

IMG_7280.jpeg

This wall has been so much work since Tuesday, but finally getting it under control. Getting the drywall up and changing out some of the electrical work since all the junction boxes were broken.

We are behind schedule and what we thought we were going to get completed this last week, but taking the week off was definitely worth it. We wouldn’t have gotten nearly this far without it.

Here’s to hoping we have a successful Saturday and Sunday.

Stay safe and healthy out there!

No More Chicken Wire...

Ooof. Why, oh why, did someone use so much chicken wire when putting these countertops in?!?!

IMG_7234.jpeg

We hit a bit of a snag on Tuesday when trying to remove the kitchen countertops. The countertops were a massive mess of tile, mortar, and chicken wire. What’s worse, the chicken wire from the countertops connected to the backsplash. So, in order to take the countertops off, we had to break through the mortar of the backsplash to cut the chicken wire. What a mess!

Have no fear, we were finally able to get all the countertops off - with some heavy frustration - and the final base cabinet was carried out around 11:30pm.


Today’s goal: Get the upper cabinets out and the backsplash off. We’re hoping to make up some time and get these knocked out by noon. So ready to be able to finally start working with our new cabinets!


Chloe’s Corner:
There’s not too much to update on Chloe. She’s been locked in the bedroom most of the time we’re working, so she’s pretty angry at her dads. Though, she’s certainly living the life of luxury… don’t feel too bad for her. Also, she doesn’t know yet, but we’re officially WFH until the end of the month… she’s going to get real annoyed with us soon.

It’s Dusty in Here…

In order to get all the old mortar up from the tile, we decided to rent a tool from Home Depot called a floor maintainer and a special attachment that cuts through mortar. It was a beast to try to maintain, but once I got a hang of it, it wasn’t so bad. My arms still feel a little weak from all the vibration and keeping the thing in line.

Downside: SO MUCH DUST. It was everywhere and even got into other areas of the house that we now need to clean.

We started getting some cabinets out. Got the island and strange set of smaller cabinets out. Today we will work on getting the rest of the cabinets out, cleaning up the wall, and hopefully start with new cabinets!

Wish us luck!

So much tile…

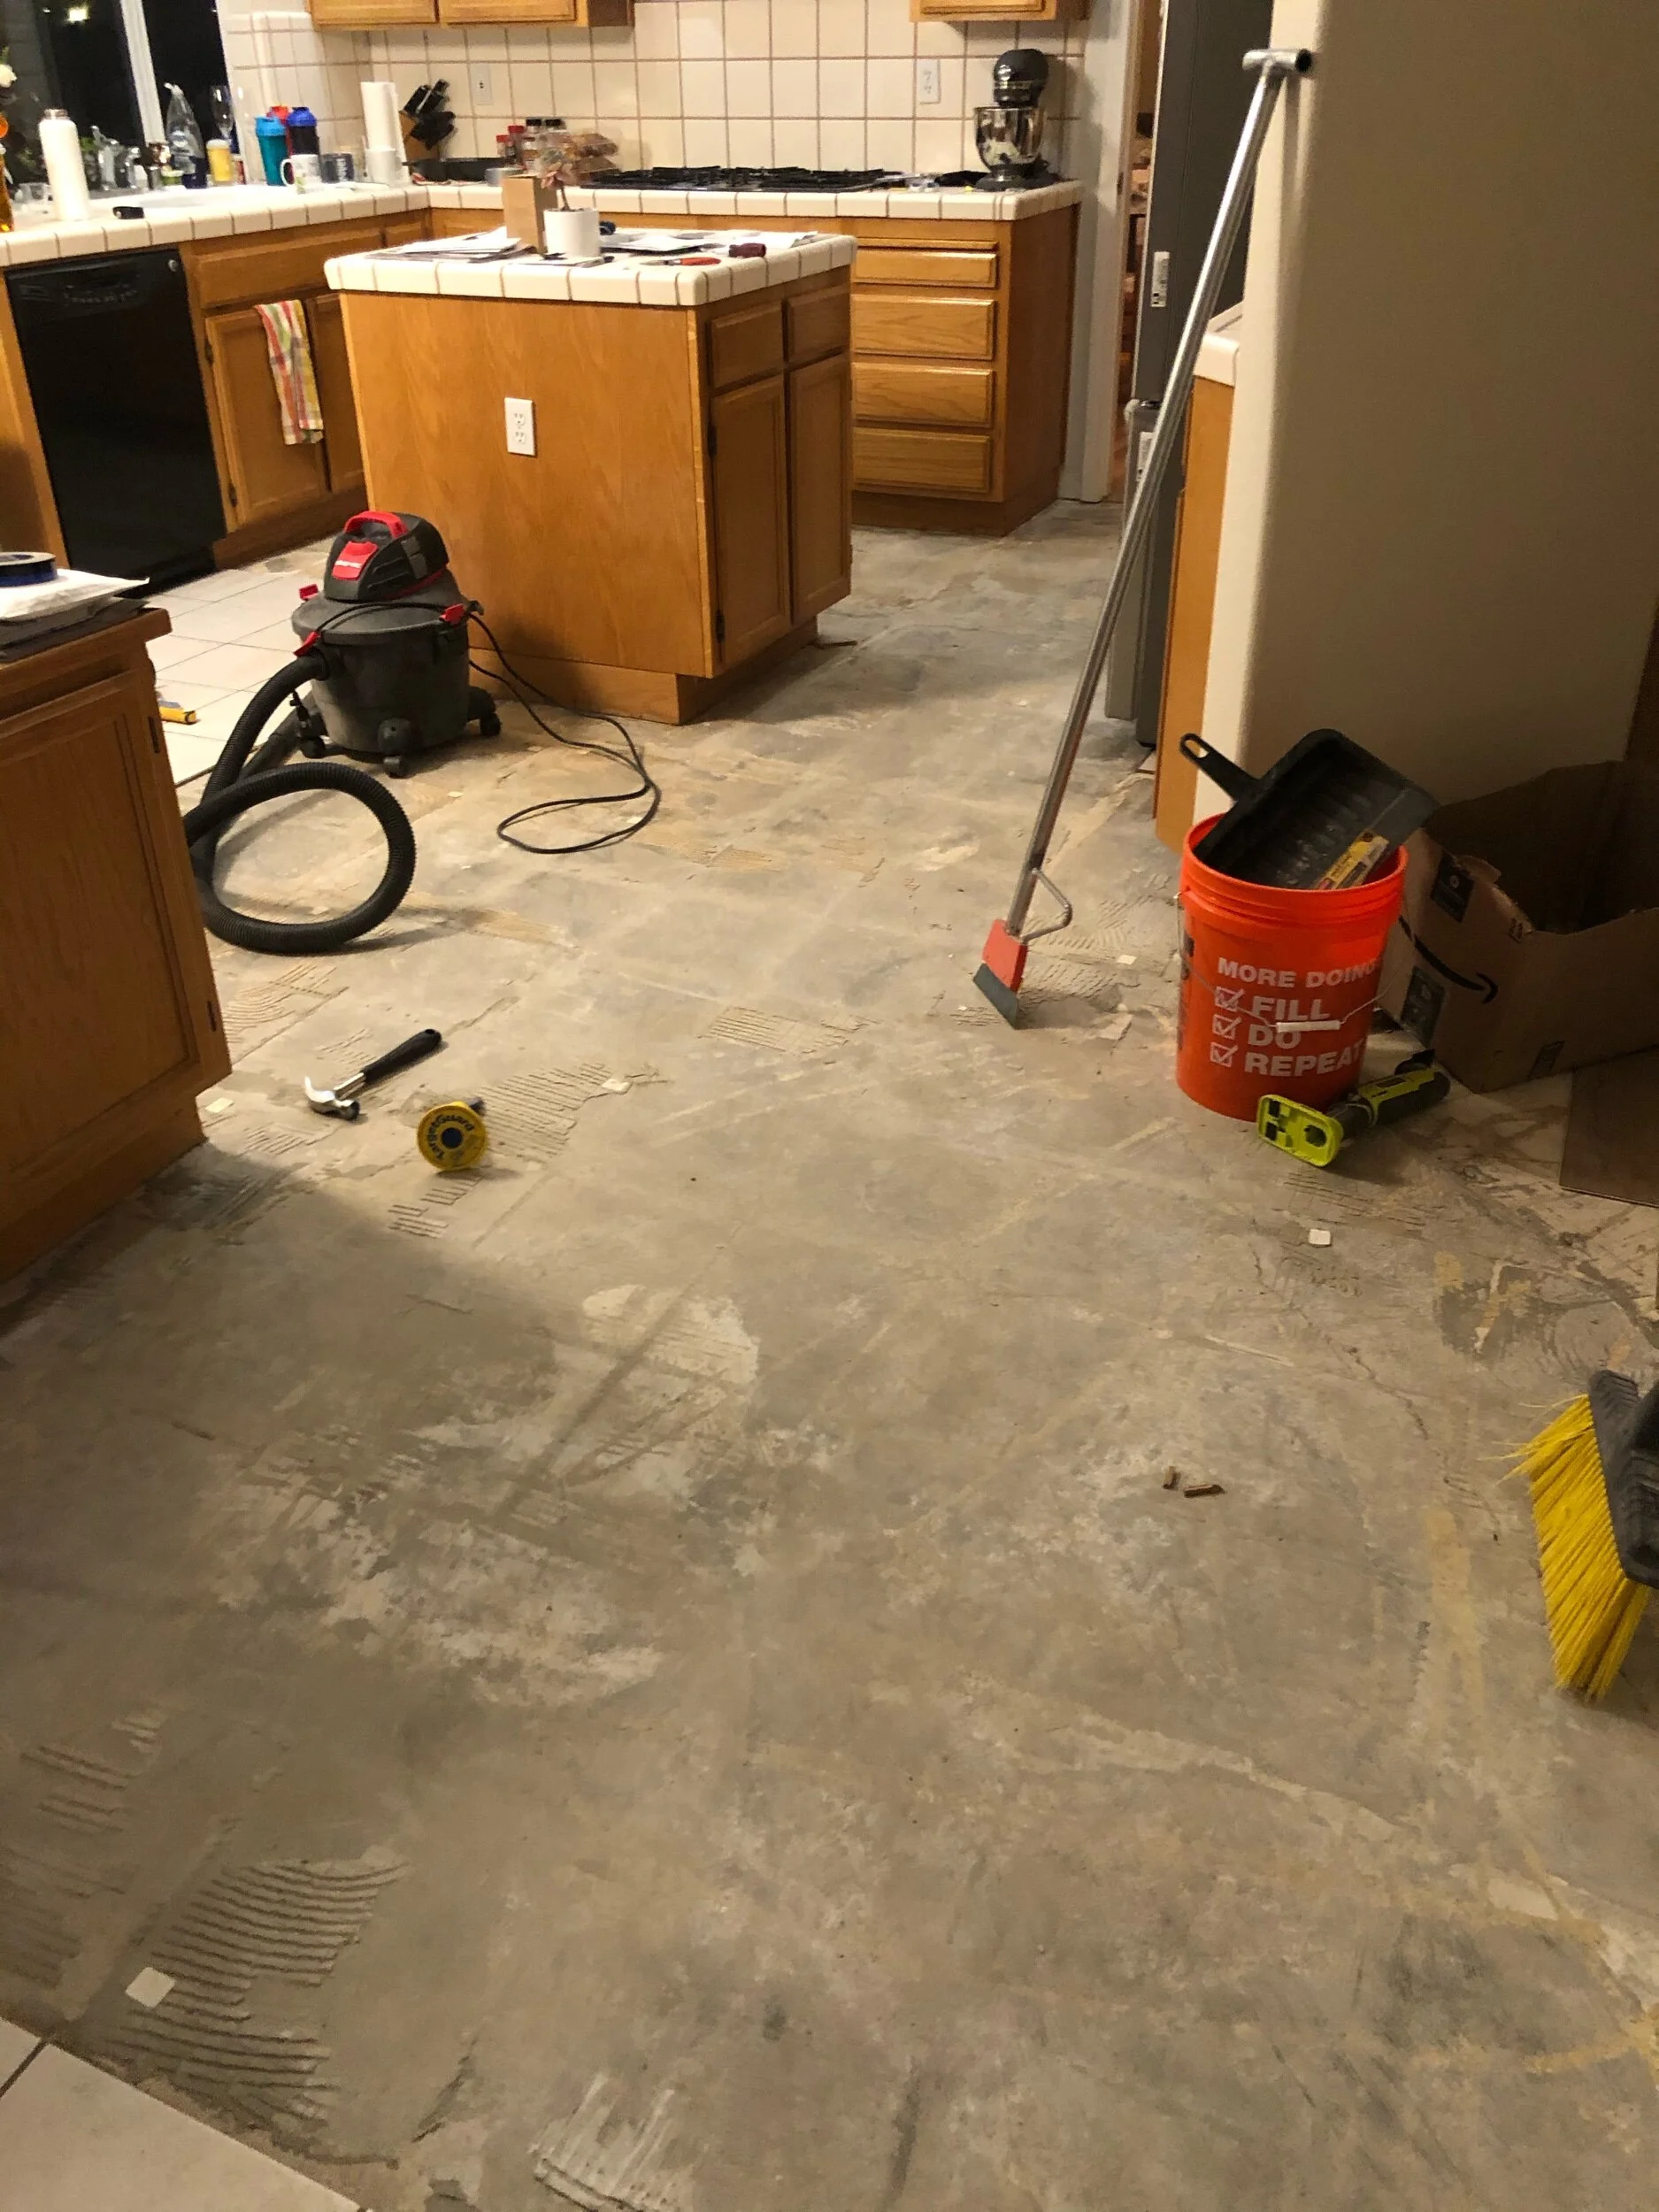
We spent a total of about 8 hours pulling up tile throughout the kitchen and family room. We will ultimately be replacing the flooring with the same wood floors in the formal living/dining space.

It took us a lot of man power to chip up the tile and now we just need to get all the mortar up. To save our bodies, we’ve decided to rent a tool from Home Depot to help in the process. Hopefully by the end of Monday, the floors will be clean and ready to go.

We also plan to start taking out the old cabinets on Monday to make room for the beautiful new ones.

Chloe spent the day sleeping and upset that she wasn’t allowed to be in the construction zone while we worked. 😜

Before she was exiled, she was keeping all of her friends close by.

Adjustments.jpeg

Embarking on the biggest project yet...

Here we are again, another long delay in updates. A lot has been going on the past 2 months. We’ve been updating little things around the house like lighting and door handles. We finished off the flooring in the formal living/dining space, including the entry “step” with some awesome new tiles.

But now, the big project starts. We are about to rip out the kitchen cabinets, flooring in the kitchen and family room, and replace it all. Our cabinets were delivered yesterday. We’re still looking for that perfect countertop, but will be making a decision on that very soon. As we go on this next big journey, we will be updating much more often with (hopefully) daily updates on how the kitchen is going. It’s an exciting project to share!!! You can also follow both of us on Instagram for some likely fun updates @dusteallen and @mrstevenjoseph.

A Quick Look at What We’ve Been Up To
New tile in the front entry and new floors in the formal living and dining space. You can also see the new chandelier we put in over the dining table.

C3E6043E-ADCC-4112-97CC-DFC39306DBB1.JPG

Before and After:
Formal living/dining space. After is on top, before on bottom. Bye, bye carpet!

Kitchen Remodel

We knew when we bought the house, we wanted to remodel the kitchen. The kitchen is currently in fine shape, but it’s dated with hard to use space and odd cabinet configurations. We wanted to put our spin on the kitchen and bring it to a modern, useful space.

We did a lot of research around kitchen cabinets. Keeping budget in mind, we made the decision to go with Ready to Assemble (RTA) cabinets and then needed to find the best place to get them. We reached out to a few of the big names in the market and got quotes. While all of them were pretty good, we ultimately decided to go with IKEA kitchen cabinets.

With IKEA, the value was greater with more configurations and ability to include things that were extra with the other companies. We did lots of research about the quality of IKEA cabinets and how they’ve held up over the years and found ourselves to be pleasantly surprised. We knew we wanted to get white shaker cabinets and IKEA offers a great looking one in their AXSTAD line. So, we took the plunge, made the order and received 122+ boxes yesterday. Now, the assembly begins!

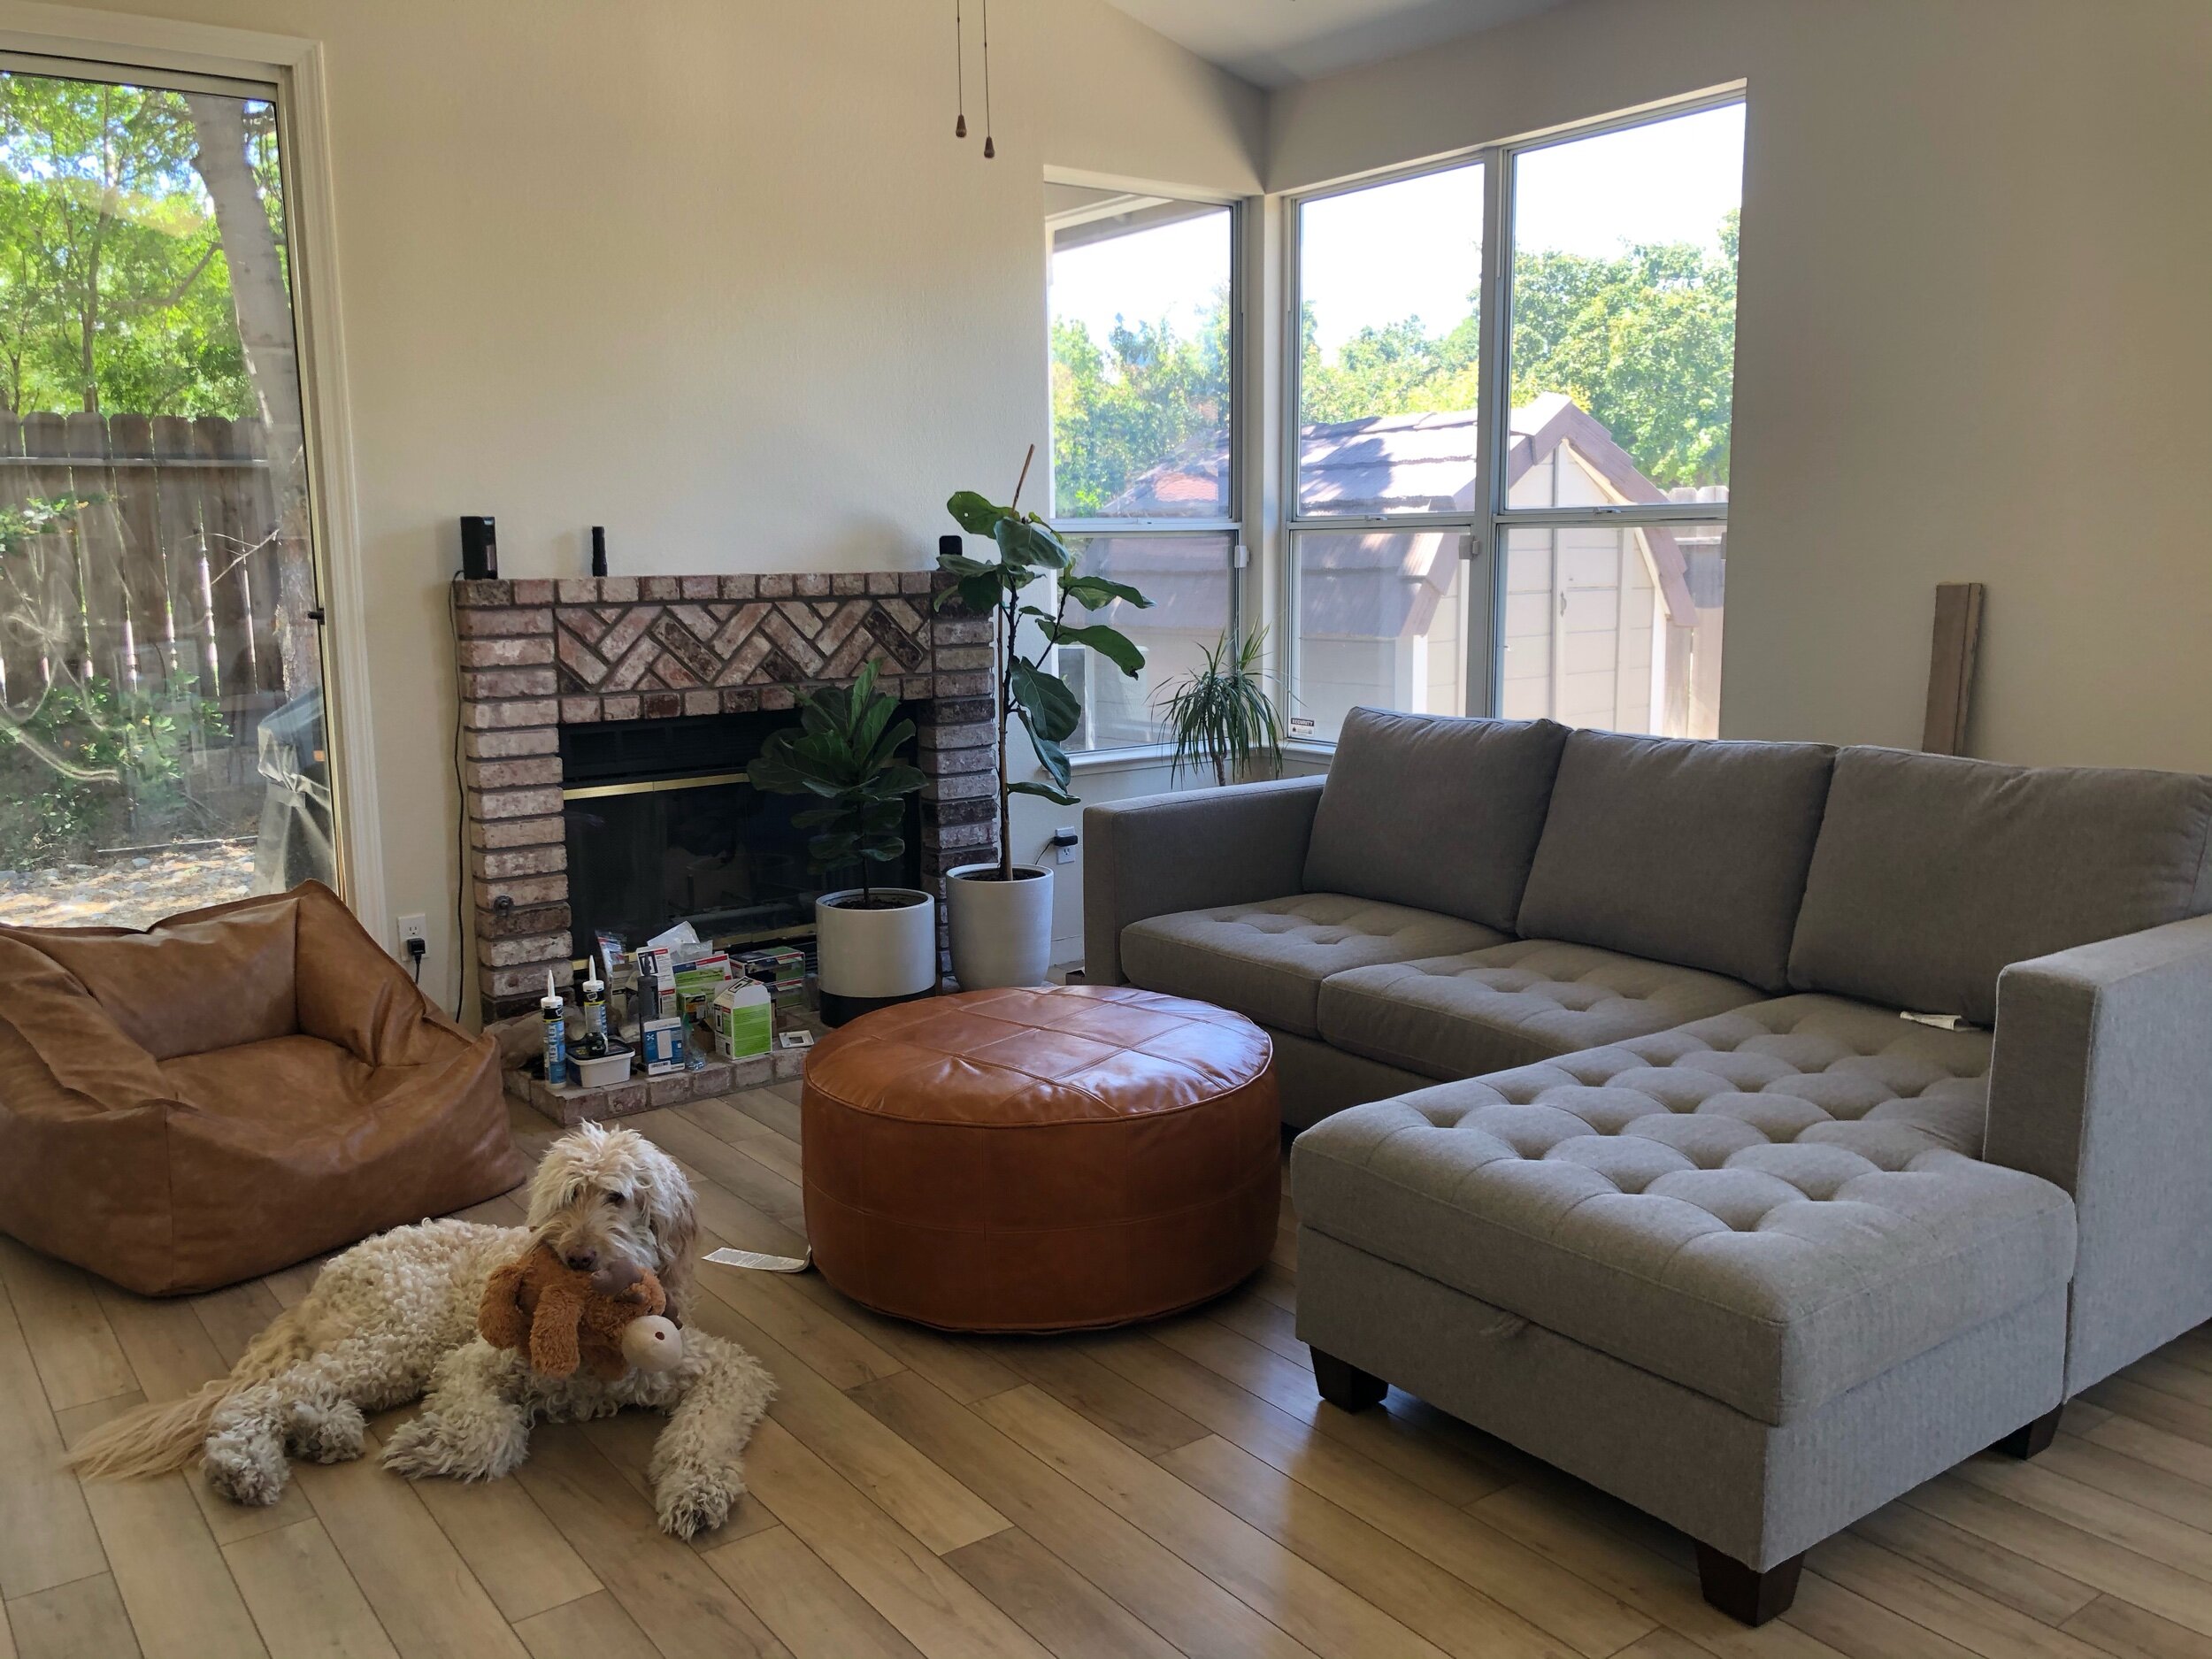
Here are some before pictures of the kitchen.

Alright, here we go! Next update: KITCHEN!


Chloe’s Corner:

I’d like to say I’m a pretty good supervisor. I stand back, let my dads be autonomous, but I do have to approve of everything they do and test it out before they’re done. For Christmas, I got a new bed that I absolutely love. It’s perfect for watching my dads work.

Projects are Long...

Well, here’s a much delayed blog post. Though, it’s like with the house… things just take longer than we ever imagined they would. As they say… something always comes up, right?

We’ve been very busy on projects around the house. Many hours trimming trees and cleaning up leaves, un-packing, planning, and cleaning. It’s certainly been a fun adventure so far and we still love each other so that’s a success!

The laundry room tile took some time and lots of hard work. We originally envisioned that we would have it done in a weekend. That was being extremely naive. As we began to pull up the old tile, we realized it was laid down poorly and took so much grunt work to get it up. After many hours of scraping mortar off the floor, we finally had it in a good state to have new tile put down.

Steven’s first cut with the new wet tile saw we purchased.

We bought some great looking tile from Home Depot and all the supplies to get the work done: mortar, trowels, grout floats, groat, and even a tile saw. We also learned some very valuable lessons: the directions on things don’t always really explain the process and to take your time. Mixing the mortar was so tough. Steven had to put so much work into getting the mortar mixed based on the directions and it just didn’t work out right. For the next round, we decided to do it our own way and mix it a little differently and it worked as it should. We took the time to layout every piece of tile, take the proper measurements, label each tile, and create a cheatsheet to know where every tile would go.

We used a large tile (24x12), which meant less tile to lay, but more cuts needed and more mortar needed on the back of each one. It took some work, but Steven mastered the tile saw. Once we got a hang of it, Steven did an amazing job getting each tile laid while I (Dustin) provided a helping hand.

Here are some pictures from the project.

We were finally able to get a washer and dryer ordered! This in itself was yet another big decision to make. Trying to read reviews from people, checking Consumer Reports, and deciding which features we wanted. It finally came down to choosing between an LG set and a Samsung set. We went with a great Samsung set of front load washer and dryer from Best Buy. So far, it has been great. We’ll have to start a review portion of the blog to provide feedback on the items we buy for the house.

We’re now onto getting the new floors down in the formal living and dining room. Another blog to come with more on our floor adventures!

Chloe’s Corner:
Getting used to the house and taking over the space making it all mine. Found my box of toys and decided to pull them all out all over the house. Not happy that my dads often tell me to get out of the room when they’re working on things, but looking forward to when it’s all done and I get more of their time back.

One Weekend Down...

We survived our first weekend as homeowners!

Our first weekend was not as productive as we had hoped. As we were reminded… “welcome to homeownership, things always come up!” We decided after being in the house longer we were okay with the paint color already there and previously done; checked that off our list. Unfortunately, the previous homeowners shut off the water to the house prior to us taking over and the City of Tracy is closed alternating Fridays, so we didn’t have any water in the house this weekend. Frustrating, but we made it work. Our new floors didn’t arrive in time, so we weren’t able to get those done (Lowe’s is taking their sweet time).

On Saturday, we had grand plans to run to Lowe’s and Home Depot for various house projects and shop for appliances. While pumping gas, we noticed a nail in our tire (face palm). Something always comes up, right? Instead of getting a head start on the day, we spent a few hours at the BMW/Mini dealer getting the tire fixed.

Finally, Sunday was our more successful day. The front door is now a great black color with nickel door knob and finishes and while Steven was working on the painting, Dustin was hard at work cleaning all the windows (damn, there’s a lot of them!).

Before we started on the front door, it was brown and had a dark-bronze handle that was a pretty traditional style. We decided to paint the door black and add a door handle with a nickel finish that had a more clean line to it. See the pictures below for a before, during, and after.

What’s Next?

This weekend is moving day! We have movers coming on Saturday to help us get everything out to Tracy. Other than moving, we’re hoping to get some work done on the floors (front room and laundry room) and start settling in a bit.

Here we go!

Follow us both on Instagram to check out our stories.
Dustin: @dusteallen
Steven: @mrstevenjoseph

The Calm Before the Storm...

Some photos of the house before we start giving it our special touch.

We loved the bones of the house. The tall ceilings (hello 12’ Christmas tree!), the big windows, and the openness of the space. Our goal is to take this beautiful home and make it ours with some refreshed finishes, new floors, updated bathrooms, and updated kitchen. We’ll be doing some landscaping work too, but holding off until the Spring for that work. We’re excited to share with you all.

The Next Journey Begins...

We are so thrilled and fortunate to be able to buy our own home. A home that we look forward to making our own with both internal and external improvements and that’s where this blog comes in. While we’re experiencing the joys and challenges of being first-time homeowners and updated our home, we’re going to be documenting it here and sharing it for anyone who wants to follow this new, exciting journey for us.

Read More